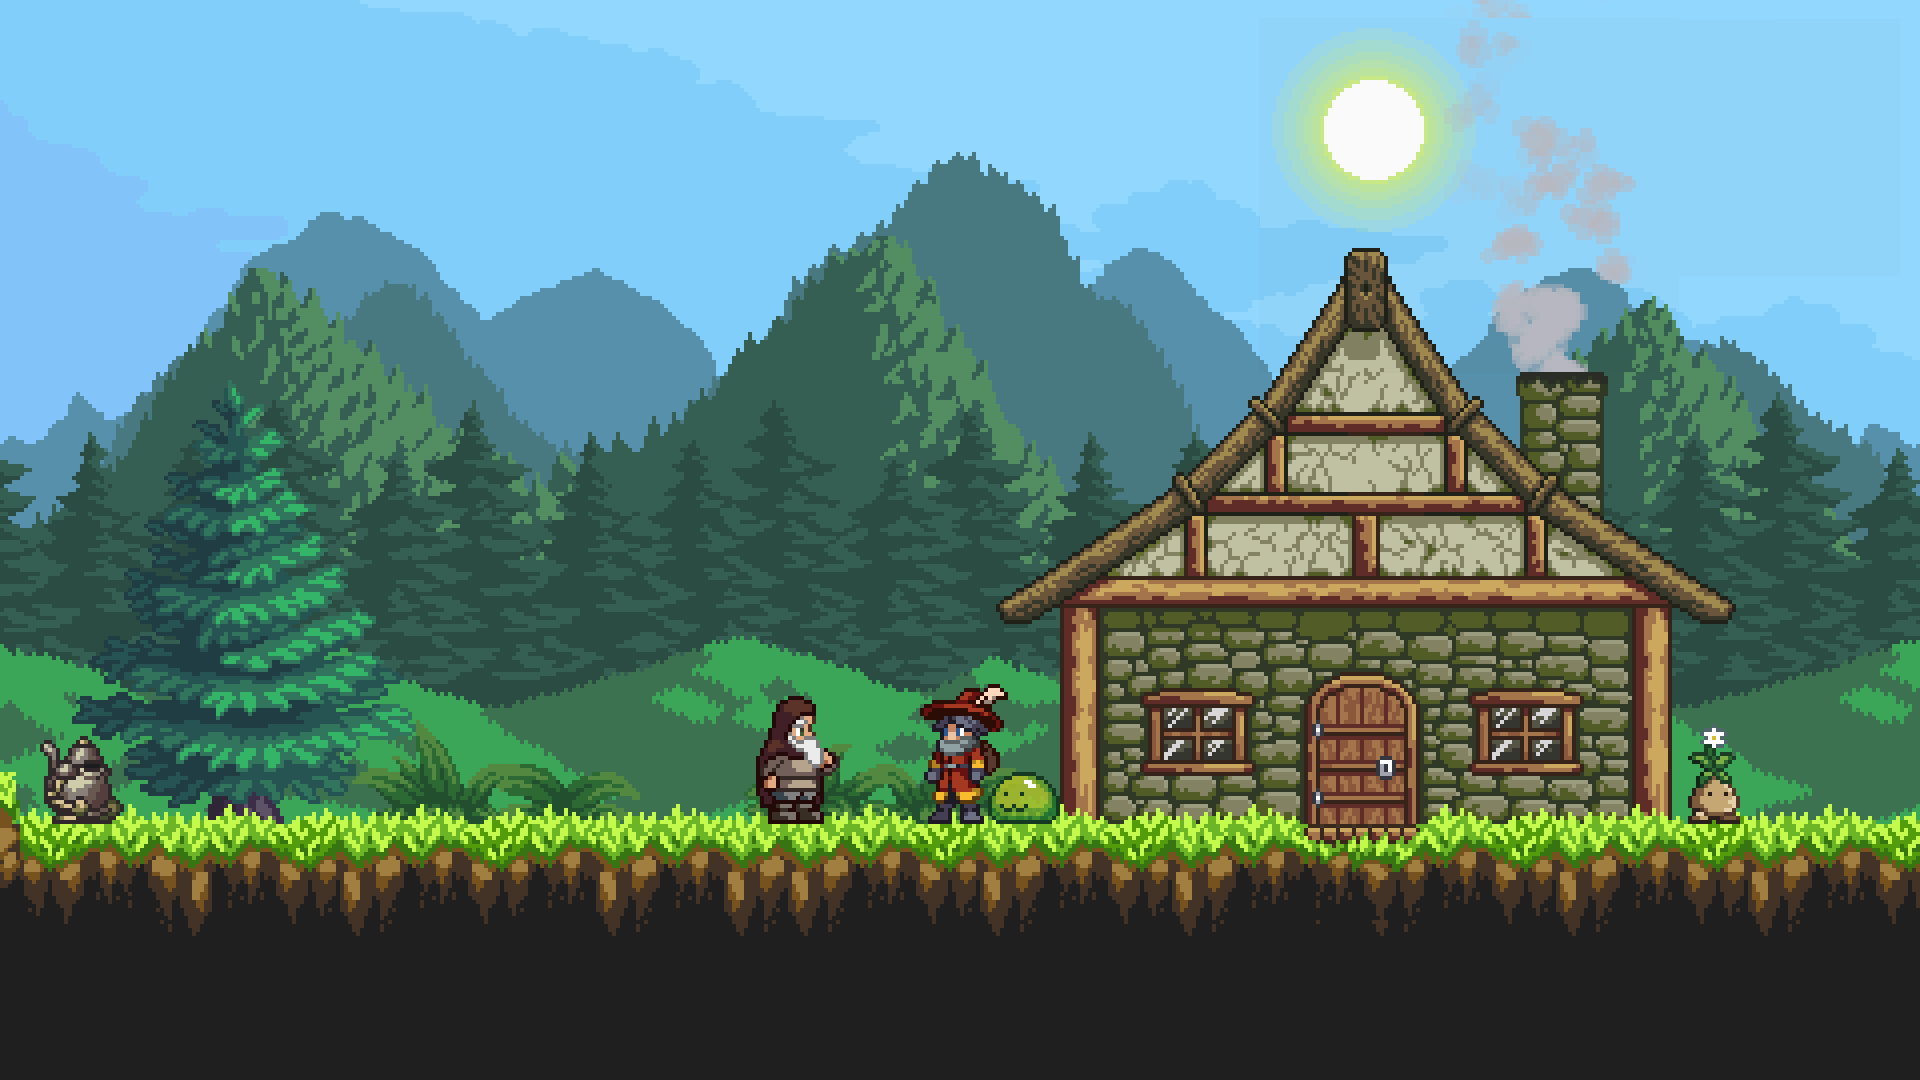
Champion Monsters are Monsters that are stronger than other Monsters normally encountered in the wild. They are shrouded by a red aura and are identified by a special Champion icon above their Health bar in battle. They can act more than once per turn, deal increased damage and have higher Health and Mana Regeneration than a regular Monster. Super Champion Monsters are optional endgame Champion Monsters and are usually more difficult to defeat.
Defeating Champion Monsters rewards the player with an item for each star achieved in the battle rating. Achieving a five-star rating gives the Champion Monster's egg or catalyst needed to evolve its pre-evolved form, whereas a six-star rating gives a number of Reward Boxes. Rewards can only be obtained once per playthrough. You can have a rematch with defeated Champion Monsters at the Keepers' Tower to improve your score and get unobtained rewards. Some Champion Monsters also appear as regular Monsters in later areas of the game, making their eggs easier to obtain. Eggs dropped by Champion Monsters are no different from any other normal Monster eggs and the hatched Monster does not have any additional bonuses. There is no way for a player to own a Monster with the Champion passive.
Champion Monsters are usually key parts of the plot and oftentimes must be defeated to advance in the game. Defeating Champion Monsters is also necessary to gain a higher Keeper Rank, which unlocks certain areas, rewards and items. The player needs to defeat a number of Champions in order to rank up. There are 27 Champion Monsters in total.
In Randomizer, the swapped Champion Monster will have the original respective Champion's stat modifiers and its six-star reward.
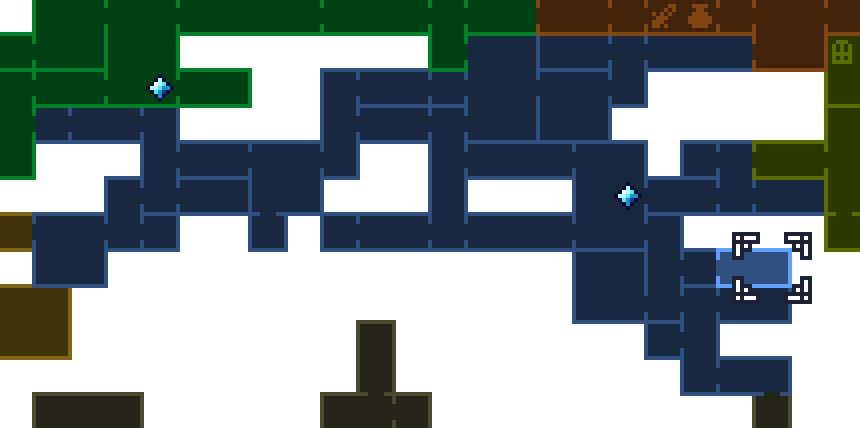
Click on a Champion Monster in the table below to jump to their section on this page.
|
|
|
|
|
| ||||||||||||
|
|
|
|
|
| ||||||||||||
|
|
|
|
|
| ||||||||||||
|
|
|
|
|
| ||||||||||||
|
|
|


Steam Golem[]
|
| ||||||||||||||||||||||||||||||||||||||||||
| Known Skills | ||||||||||||||||||||||||||||||||||||||||||
| Actives |
| |||||||||||||||||||||||||||||||||||||||||
| Passives |
| |||||||||||||||||||||||||||||||||||||||||
| Advanced (min level: 35) | ||||||||||||||||||||||||||||||||||||||||||
|
| ||||||||||||||||||||||||||||||||||||||||||
| Master Mode | ||||||||||||||||||||||||||||||||||||||||||
|
| ||||||||||||||||||||||||||||||||||||||||||

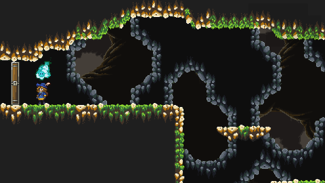
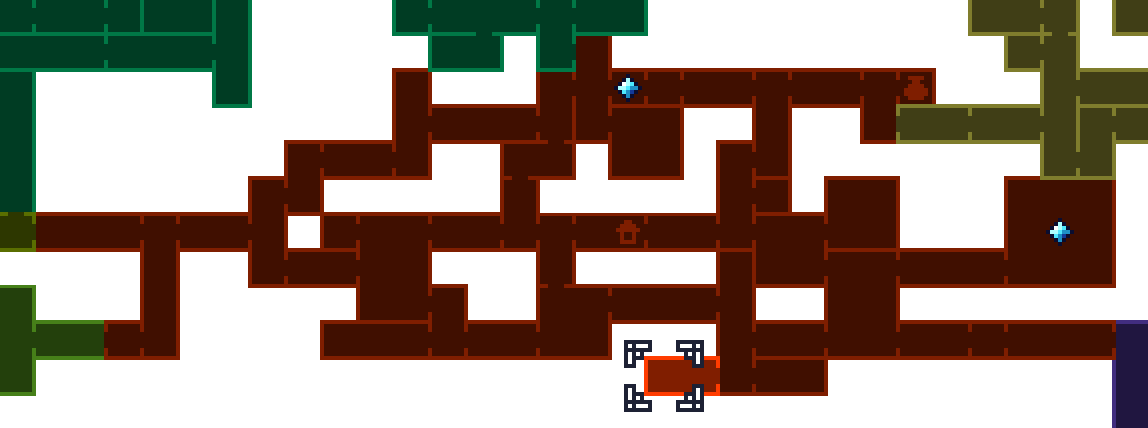
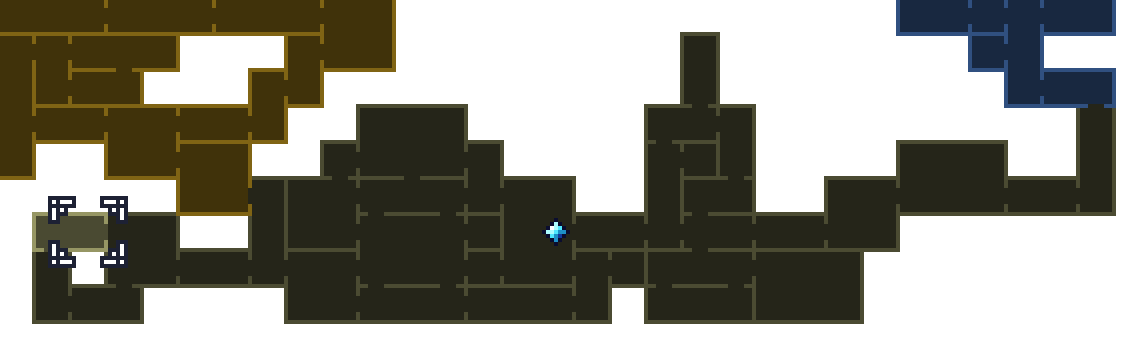
Steam Golem is a Champion Monster in the Mountain Path. You must defeat it in order to progress the main storyline. Old Buran will also give you a Mountain Path Key once you defeat the Steam Golem. Click here for more details!
Talk to Old Buran to initiate the fight
After defeating Old Buran's Blobs, he informs you of Champion Monsters and that the Steam Golem behind him is one of them. Once you are ready, talk to him again, and he will activate the Steam Golem.
 |
Strategy[]
Early game strategy: Applying Debuffs to the Steam Golem, such as Poison and Armor Break can be effective. Blob has access to both Debuffs and can be used to rack up Combos or heal once the Debuffs are applied. Even if you can't target the Golem's weakness, the Poison and endurance should be enough to win this battle. Another good strategy is to have one or two Vaeros in the party, as they can do massive damage with their Feather Storm attack.
Monk[]
|
| ||||||||||||||||||||||||||||||||||||||||||
| Known Skills | ||||||||||||||||||||||||||||||||||||||||||
| Actives |
| |||||||||||||||||||||||||||||||||||||||||
| Advanced (min level: 25) | ||||||||||||||||||||||||||||||||||||||||||
|
| ||||||||||||||||||||||||||||||||||||||||||
| Passives |
| |||||||||||||||||||||||||||||||||||||||||
| Advanced (min level: 25) | ||||||||||||||||||||||||||||||||||||||||||
|
| ||||||||||||||||||||||||||||||||||||||||||
| Master Mode | ||||||||||||||||||||||||||||||||||||||||||
|
| ||||||||||||||||||||||||||||||||||||||||||

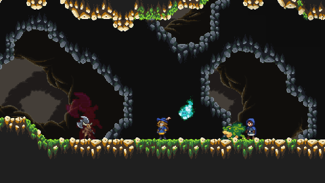
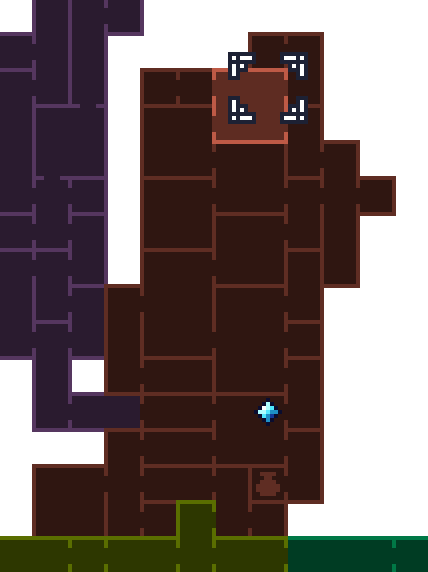
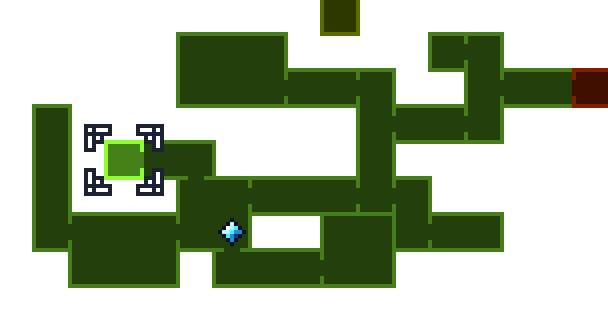
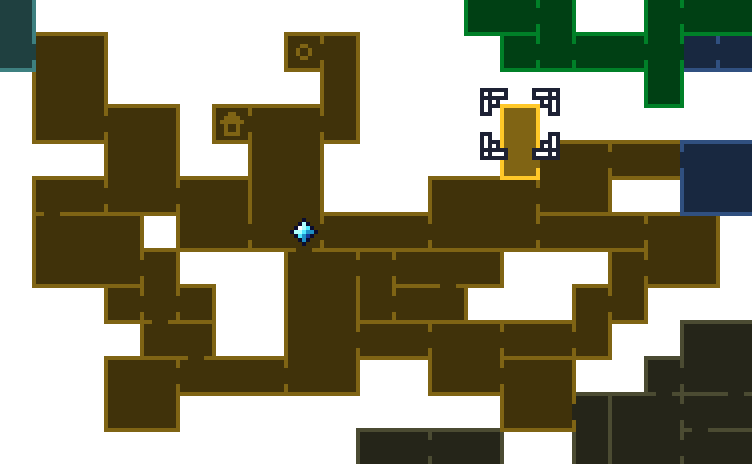
Monk is an optional Champion Monster in the Mountain Path. This Champion Monster was locked behind a door by Old Buran. Click here for more details!


Once you defeat the Steam Golem Champion, Old Buran gives you a Mountain Path Key. Use the key to open the locked door west of the Teleporter Stone. In the next room, the Monk awaits. Alternatively, you can enter from the left entrance once you obtain the Double Jump Boots.
 |
Strategy[]
Early game strategy: The Monk's weakness to Earth attacks is the key to finishing this fight fast, especially since Poison will do massive amounts of damage at the start of the turn. A good strategy is to bring a Blob to get both Poison and heals, and use one or two Rockies to deal damage with their Leaf Slash attack. If you don't fight it initially, you can come back later with a Fungi and stack Poison with its Multi Poison skill, which will wrap things up quickly.
Minitaur[]
|
| ||||||||||||||||||||||||||||||||||||||||||
| Known Skills | ||||||||||||||||||||||||||||||||||||||||||
| Actives |
| |||||||||||||||||||||||||||||||||||||||||
| Master Mode | ||||||||||||||||||||||||||||||||||||||||||
|
| ||||||||||||||||||||||||||||||||||||||||||
| Passives |
| |||||||||||||||||||||||||||||||||||||||||
| Advanced (min level: 20) | ||||||||||||||||||||||||||||||||||||||||||
|
| ||||||||||||||||||||||||||||||||||||||||||
| Master Mode | ||||||||||||||||||||||||||||||||||||||||||
|
| ||||||||||||||||||||||||||||||||||||||||||

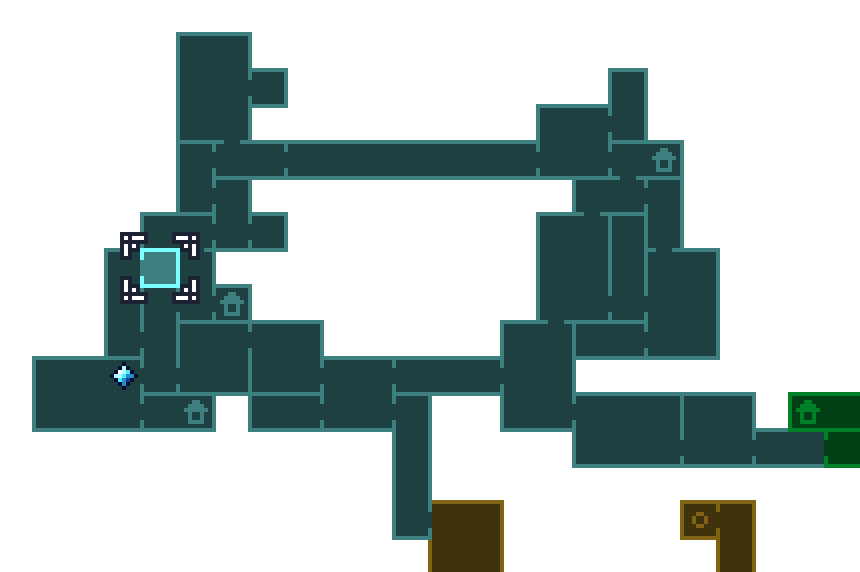
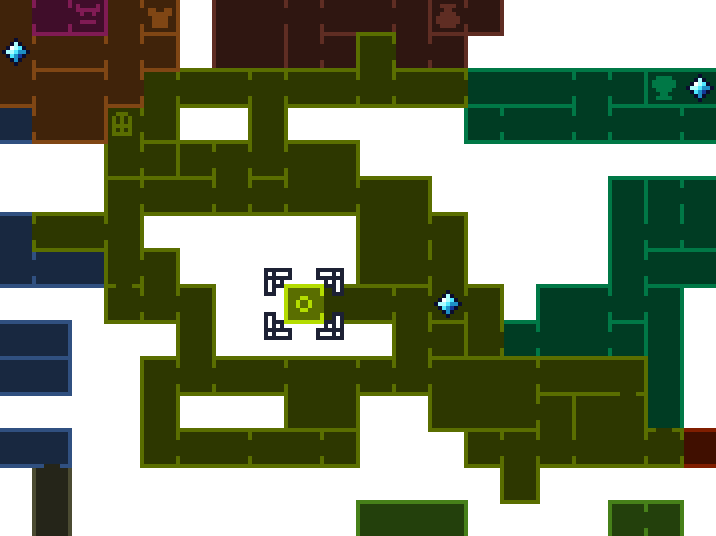
Minitaur is a Champion Monster in the Blue Caves. You must defeat it in order to progress the main storyline. Click here for more details!
Once you obtain the Double Jump Boots, go to the Teleporter Stone and jump up until you get to a locked door. You can find the Blue Caves Key in the eastern parts of the Blue Caves. When you enter the room, you are greeted by a masked man, who mentions it might be dangerous for you to continue, then laughs before leaving you alone. You meet up with Will, who is intimidated by the Champion and will only observe your fight with the Minitaur.
 |
Strategy[]
Early game strategy: The Minitaur is vulnerable to Fire. Due to its Fire Weakness and high Attack stat, the Burn Debuff can deal tons of damage to it. Magmapillar can be used to apply Burn and shield the whole party, whereas Tengu or Spectral Eagle can be used as a high-damage Fire attacker. if you managed to obtain Steam Golem, you can use it in this battle and if it has reached level 10, you are able to stack Burn through its Multi Burn.
Specter[]
|
| ||||||||||||||||||||||||||||||||||||||||||
| Known Skills | ||||||||||||||||||||||||||||||||||||||||||
| Actives |
| |||||||||||||||||||||||||||||||||||||||||
| Passives |
| |||||||||||||||||||||||||||||||||||||||||
| Advanced (min level: 35) | ||||||||||||||||||||||||||||||||||||||||||
|
| ||||||||||||||||||||||||||||||||||||||||||
| Master Mode | ||||||||||||||||||||||||||||||||||||||||||
|
| ||||||||||||||||||||||||||||||||||||||||||

Specter is an optional Champion Monster in the Blue Caves. It guards a chest containing a Medallion as well as the exit to the Mountain Path. Click here for more details!

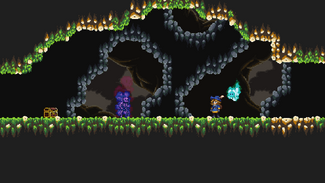
The Specter Champion
Once you obtain the Double Jump Boots, you are able to explore the western parts of the Blue Caves. Specter can be found in the far top right area after the room with the Lightning and Earth Orbs.
 |
Strategy[]
Early game strategy: The Specter can be tricky, since it can do a lot of damage if you're not careful. Avoid using Monsters with Fire Weakness, as Specter is guaranteed to hit them with Flamestrike. It is recommended for your Monsters to be at least level 10. A good strategy is to use Frosty's or Tengu's high Magic stat to exploit its Magical Weakness. If you have obtain Manticorb from the Mountain Path, it is a strong pick against Specter as Manticorb resists all of Specter's attacks and can deal a good amount of damage. Debuffs are useful to get a better score for the fight but are not effective against Specter due to its Debuff Resistance.
Beetloid[]
|
| ||||||||||||||||||||||||||||||||||||||||||
| Known Skills | ||||||||||||||||||||||||||||||||||||||||||
| Actives |
| |||||||||||||||||||||||||||||||||||||||||
| Master Mode | ||||||||||||||||||||||||||||||||||||||||||
|
| ||||||||||||||||||||||||||||||||||||||||||
| Passives |
| |||||||||||||||||||||||||||||||||||||||||
| Advanced (min level: 35) | ||||||||||||||||||||||||||||||||||||||||||
|
| ||||||||||||||||||||||||||||||||||||||||||
| Master Mode | ||||||||||||||||||||||||||||||||||||||||||
|
| ||||||||||||||||||||||||||||||||||||||||||

Beetloid is a Champion Monster in the Stronghold Dungeon. You must defeat it to get to the Dungeon Library. According to the plot of the game, there were originally two, but one was finished off by Will before the player got there. Click here for more details!

The Beetloid Champion
Starting from the Teleporter Stone, go left and then the bottom left exit of the next room. You meet up with Will, saying the Dungeon's library is further ahead, underneath the sewers. Keep going left until you see Will again. This time he tells you he managed to defeat a Champion Monster just before another one appears. He lets you to take care of the Beetloid.
 |
Strategy[]
Early game strategy: Beetloid's attacks only covers Wind and Magical damage, which means it's good to use Monsters with either Wind Resistance or Magical Resistance. The fight can also be greatly exploited by Debuffs, making Fungi and Goblin Warlock great choices for this fight. With both Monsters, you are able stack up to 5 Poison stacks (if both already learn Multi Poison), which will quickly chip away Beetloid's Health. Goblin Warlock can heal your party and resists Beetloid's attacks, whereas Fungi can generate tons of Combo, which would boost your third Monster's attacks. If you don't have Goblin Warlock yet, you can use Blob or Grummy instead. Manticorb's Magical Resistance, Debuff applications and strong attacks are also useful for this fight.
Goblin King[]
|
| ||||||||||||||||||||||||||||||||||||||||||
| Known Skills | ||||||||||||||||||||||||||||||||||||||||||
| Actives |
| |||||||||||||||||||||||||||||||||||||||||
| Passives |
| |||||||||||||||||||||||||||||||||||||||||
| Advanced (min level: 30) | ||||||||||||||||||||||||||||||||||||||||||
|
| ||||||||||||||||||||||||||||||||||||||||||
| Master Mode | ||||||||||||||||||||||||||||||||||||||||||
|
| ||||||||||||||||||||||||||||||||||||||||||

Goblin King is a Champion Monster in the Goblin Fort of the Ancient Woods. If you have not defeated it yet, Julia will prevent you from advancing the Horizon Beach. Click here for more details!


Once you chase down Ostanes, you must unlock the door using an Ancient Woods Key found directly west of the area. The Goblin King will always fight alongside a Goblin Hood and Goblin Warlock.
 |
Strategy[]
The Goblin King fights alongside a Goblin Hood and Goblin Warlock, which always start by casting Glory and Channel, respectively, at the start of their turn. The Goblins' Physical Weakness makes strong Physical damage dealers, such as Catzerker, Minitaur and Blade Widow, the best pick for this fight. Have a support use Full Offense on your damage dealer while they use a Physical Multi Target attack to deal damage to both the Goblin King and its minions. If you don't have a Multi Target attack, focus on Goblin King's minions first.
Raduga[]
|
| |||||||||||||||||||||||||||||||||||||||||
| Known Skills | |||||||||||||||||||||||||||||||||||||||||
| Actives |
| ||||||||||||||||||||||||||||||||||||||||
| Passives |
| ||||||||||||||||||||||||||||||||||||||||
| Advanced (min level: 35) | |||||||||||||||||||||||||||||||||||||||||
|
| |||||||||||||||||||||||||||||||||||||||||
| Master Mode | |||||||||||||||||||||||||||||||||||||||||
|
| |||||||||||||||||||||||||||||||||||||||||

Notes: Raduga does not normally know Combo Healing (nor is able to trigger it).
Raduga is a Champion Monster in the Ancient Woods. You must defeat it to enter the Horizon Beach. Click here for more details!


At the far east of the Ancient Woods, you'll come across a room with four elemental orbs: Fire, Water, Lightning, and Earth. You need to activate all four orbs to open the gates. Raduga can be fought in the next room.
 |
Strategy[]
The Raduga sports a somewhat unique trait in Elemental Shift. Its resistance and weakness change based on the Element of the last attack it used. Due to its changing nature, use damage dealing Monsters with a variety of elemental attacks such as Monk, Manticorb or Ninki Nanka. As long as your Monsters can hit hard with the right elemental weaknesses, Raduga will fall quickly. Casting a variety of damaging Debuffs also work well in clearing out Raduga's Health.
| Using |
Using | |
|---|---|---|
| Using |
Using | |
Akhlut[]
|
| ||||||||||||||||||||||||||||||||||||||||||
| Known Skills | ||||||||||||||||||||||||||||||||||||||||||
| Actives |
| |||||||||||||||||||||||||||||||||||||||||
| Advanced (min level: 25) | ||||||||||||||||||||||||||||||||||||||||||
|
| ||||||||||||||||||||||||||||||||||||||||||
| Passives |
| |||||||||||||||||||||||||||||||||||||||||
| Advanced (min level: 25) | ||||||||||||||||||||||||||||||||||||||||||
|
| ||||||||||||||||||||||||||||||||||||||||||
| Master Mode | ||||||||||||||||||||||||||||||||||||||||||
|
| ||||||||||||||||||||||||||||||||||||||||||

Notes: Akhlut does not normally know Chilling Cold.
Akhlut is a Champion Monster in the Snowy Peaks. You must defeat it to obtain a Sanctuary Token from the Oracle. Click here for more details!

Approach the Oracle to initiate the fight
Once you obtain the Warm Underwear from the Clothes Maker, you are able to dive into the lake far west of Snowy Peaks, nearby the Teleporter Stone. At the bottom right of the lake is an entrance to the Frozen Oracle's Cave. The Oracle will test your skills by pitting you against her Akhlut.
 |
Strategy[]
Exploit its wind weakness.
Qilin[]
|
| ||||||||||||||||||||||||||||||||||||||||||
| Known Skills | ||||||||||||||||||||||||||||||||||||||||||
| Actives |
| |||||||||||||||||||||||||||||||||||||||||
| Master Mode | ||||||||||||||||||||||||||||||||||||||||||
|
| ||||||||||||||||||||||||||||||||||||||||||
| Passives |
| |||||||||||||||||||||||||||||||||||||||||
| Advanced (min level: 35) | ||||||||||||||||||||||||||||||||||||||||||
|
| ||||||||||||||||||||||||||||||||||||||||||
| Master Mode | ||||||||||||||||||||||||||||||||||||||||||
|
| ||||||||||||||||||||||||||||||||||||||||||

Notes: Qilin does not normally know Armor Shred.
Qilin is a Champion Monster in the Sun Palace. You must defeat it in order to progress through the Sun Palace and rise the tower for the second time. Click here for more details!

The Qilin Champion
After raising the tower and lowering the water once, you are able to explore the first section of the aqueducts area. At the end of the section is the second lever puzzle of the Sun Palace. Once you solve the puzzle, you will find Qilin at the end of the next room.
 |
Strategy[]
Its ![]() Debuff Weakness makes it susceptible to all forms of Debuff effects. Focus with a team who can stack damage debuff abilities (burn + multi burn, poison + multi poison, multi chill + congeal). These also include auto-debuff and weaken debuffed Monsters (especially armor break). Some items will also help, such as Cauldron, Thermal Reactor, or Poisoned Dart.
Debuff Weakness makes it susceptible to all forms of Debuff effects. Focus with a team who can stack damage debuff abilities (burn + multi burn, poison + multi poison, multi chill + congeal). These also include auto-debuff and weaken debuffed Monsters (especially armor break). Some items will also help, such as Cauldron, Thermal Reactor, or Poisoned Dart.
Kanko[]
|
| ||||||||||||||||||||||||||||||||||||||||||
| Known Skills | ||||||||||||||||||||||||||||||||||||||||||
| Actives |
| |||||||||||||||||||||||||||||||||||||||||
| Passives |
| |||||||||||||||||||||||||||||||||||||||||
| Advanced (min level: 35) | ||||||||||||||||||||||||||||||||||||||||||
|
| ||||||||||||||||||||||||||||||||||||||||||
| Master Mode | ||||||||||||||||||||||||||||||||||||||||||
|
| ||||||||||||||||||||||||||||||||||||||||||

Kanko is an optional Champion Monster in the Sun Palace. Click here for more details!

Use a Monster with Ignite or Fiery Shots on the pipe to initiate the fight
Once the tower has been raised for the third time, climb the tower and enter the left room. In the room, there is a pipe on the ground. Using a Monster with Ignite or Fiery Shots on it will trigger the battle with Kanko.
 |
Strategy[]
Kanko focuses heavily on evasion to generate additional buffs for itself. As such, effective counters include utilizing Poison or Leaf Slash. As it can't avoid the damage from either of these and its Earth weakness makes it susceptible to both, they should facilitate an easy victory. Several Monsters with Leaf Slash also have Cleanse to clear away any pesky buffs that the Monster builds up throughout the fight.
Elderjel[]
|
| ||||||||||||||||||||||||||||||||||||||||||
| Known Skills | ||||||||||||||||||||||||||||||||||||||||||
| Actives |
| |||||||||||||||||||||||||||||||||||||||||
| Master Mode | ||||||||||||||||||||||||||||||||||||||||||
|
| ||||||||||||||||||||||||||||||||||||||||||
| Passives |
| |||||||||||||||||||||||||||||||||||||||||
| Master Mode | ||||||||||||||||||||||||||||||||||||||||||
|
| ||||||||||||||||||||||||||||||||||||||||||

Elderjel is a Champion Monster in the Horizon Beach. It guards two chests containing 2000 G and a Sanctuary Token as well as the right-side entrance of the Magma Chamber. Click here for more details!
The Elderjel Champion
After you save Leonard from a pit, he will help open the entrance of the treasure cave along with Julia. Keep moving forward, and you will come across them again. Julia spots an Elderjel and mentions they can become powerful over time. Leonard's Familiar suggests you battle it as they still owe you for helping them, which Leonard reluctantly permits but not Julia. You must defeat her in a Keeper Duel before she lets you battle the Elderjel.
 |
Strategy[]
Its ![]() Neutral Weakness is novel and somewhat new to many Keepers. The Monster takes increased damage from Neutral attacks of any kind. Given its weakness to Neutral attacks, a Shield Burst team works well against Elderjel. If you want to 5-star Elderjel, focus on killing it as quickly as possible, as it heals quickly and gets stronger over time due to its Aging skill.
Neutral Weakness is novel and somewhat new to many Keepers. The Monster takes increased damage from Neutral attacks of any kind. Given its weakness to Neutral attacks, a Shield Burst team works well against Elderjel. If you want to 5-star Elderjel, focus on killing it as quickly as possible, as it heals quickly and gets stronger over time due to its Aging skill.
Asura[]
|
| ||||||||||||||||||||||||||||||||||||||||||
| Known Skills | ||||||||||||||||||||||||||||||||||||||||||
| Actives |
| |||||||||||||||||||||||||||||||||||||||||
| Passives |
| |||||||||||||||||||||||||||||||||||||||||
| Master Mode | ||||||||||||||||||||||||||||||||||||||||||
|
| ||||||||||||||||||||||||||||||||||||||||||

Notes: Asura is not able to trigger Assistance by itself.
Asura is a Champion Monster in the Magma Chamber. It guards a chest containing a Sanctuary Token. Click here for more details!

The Asura Champion
After you defeated Rhazes in a Keeper Duel, he tells you the Sanctuary Token can be found in the deepest room of the Magma Chamber, guarded by a fierce warrior. When you get to the room, you come across Will, who just fought the Champion and lost. This motivates him to become stronger and he leaves you to take care of the Asura.
 |
Strategy[]
Using a chill debuff team with freeze (such as Yowie + Frosty) will hit Asura hard.
Goblin Pilot[]
|
| ||||||||||||||||||||||||||||||||||||||||||
| Known Skills | ||||||||||||||||||||||||||||||||||||||||||
| Actives |
| |||||||||||||||||||||||||||||||||||||||||
| Passives |
| |||||||||||||||||||||||||||||||||||||||||
| Master Mode | ||||||||||||||||||||||||||||||||||||||||||
|
| ||||||||||||||||||||||||||||||||||||||||||

Notes: Goblin Pilot does not normally know Armor Shred.
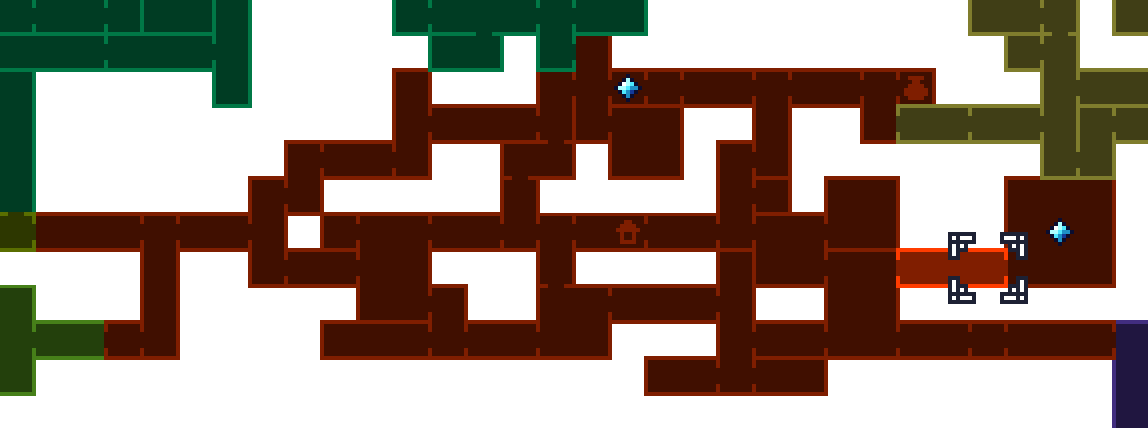
Goblin Pilot is a Champion Monster in the Mystical Workshop. You must defeat it in order to progress through the Mystical Workshop and open the entrance to the Abandoned Tower. Click here for more details!


Upon approaching the top of the Mystical Workshop, Trevisan catches up with you but finds the path blocked by three doors, each requiring a Mystical Workshop Key. You must explore the rest of the Mystical Workshop to obtain all three keys before progressing onward. Trevisan then tells you that there must be a Champion nearby, as he implies Marduk uses them to guard places, and in this case, the Goblin Pilot.
 |
Strategy[]
Exploit Goblin Pilot's weaknesses.
Dracozul[]
|
| ||||||||||||||||||||||||||||||||||||||||||
| Known Skills | ||||||||||||||||||||||||||||||||||||||||||
| Actives |
| |||||||||||||||||||||||||||||||||||||||||
| Passives |
| |||||||||||||||||||||||||||||||||||||||||
| Master Mode | ||||||||||||||||||||||||||||||||||||||||||
|
| ||||||||||||||||||||||||||||||||||||||||||

Notes: Dracozul does not normally know Combo Buffing.
Dracozul is an optional Champion Monster in the Snowy Peaks. Click here for more details!


Go to the room right of the Teleporter Stone in the Snowy Peaks. Climb upwards until you spot a diamond block. Destroy the block and climb upwards again in the next room, and you will come across the entrance to Dracozul's roost. The Dracozul will always fight alongside two Draconovs.
 |
Strategy[]
It always fights alongside a pair of Draconov allies, which focus on setting up buffs for the Dracozul. Like the Goblin King, use a last-hitter monster who can hit all enemies (such as earthquake). Otherwise, focus on its Draconov allies first.
Brutus[]
|
| |||||||||||||||||||||||||||||||||||||||||
| Known Skills | |||||||||||||||||||||||||||||||||||||||||
| Actives |
| ||||||||||||||||||||||||||||||||||||||||
| Passives |
| ||||||||||||||||||||||||||||||||||||||||
| Master Mode | |||||||||||||||||||||||||||||||||||||||||
|
| |||||||||||||||||||||||||||||||||||||||||

Brutus is an optional Champion Monster in the Ancient Woods. Click here for more details!


Brutus can be found in the dark tunnels underneath the sunny Ancient Woods. You need a Monster that can destroy breakable walls as well as a Monster with Improved Flying, Lofty Mount or Dual Mobility to access the area. The area has two entrances: the east entrance, located underneath the eastern parts of the Goblin Fort, and the west entrance, above the 2-Nightwings 1-Molebear spawn on the western parts of the Ancient Woods. You must navigate the dark area and avoid spikes to get to Brutus's room.
 |
Strategy[]
Brutus is a unique Monster, in which it does not posses any weaknesses and resistances. Unlike most other Champion Monsters, Brutus will act for three turns, always ending its turn with Power Focus. Due to this Monster's high attack stat and having no weaknesses, battling this Monster will be a difficult task. However, this Monster can be easily exploited with Chill debuff as it has poor mana stat. The best Monsters to use would be Specter or Arachlich as both resists all of Brutus's attacks as well as access to Congeal, Fatal Upkeep/Multi Chill, and other tick damage such as Poison and Burn/Bleed. If you can't defeat it then use fungi fungi troll or g'rulu g'rulu troll
Draconoir[]
|
| ||||||||||||||||||||||||||||||||||||||||||
| Known Skills | ||||||||||||||||||||||||||||||||||||||||||
| Actives |
| |||||||||||||||||||||||||||||||||||||||||
| Passives |
| |||||||||||||||||||||||||||||||||||||||||
| Master Mode | ||||||||||||||||||||||||||||||||||||||||||
|
| ||||||||||||||||||||||||||||||||||||||||||

Draconoir is a Champion Monster in the Underworld. You must defeat it to complete the Underworld mission and obtain the Key of Power. Click here for more details!
Approach Zosimos to initiate the fight
To get to Draconoir, you need to navigate and solve the catacombs puzzle of the Underworld. Once you do, you can access the room containing the Key of Power. You will encounter Zosimos there, and after he's done talking, he summons the Draconoir to fight you.
 |
Strategy[]
Draconoir's attacks spam Blind. Focus with physical moves that cannot be dodged, or bring a strong debuff team.
Spinner[]
|
| ||||||||||||||||||||||||||||||||||||||||||
| Known Skills | ||||||||||||||||||||||||||||||||||||||||||
| Actives |
| |||||||||||||||||||||||||||||||||||||||||
| Passives |
| |||||||||||||||||||||||||||||||||||||||||
| Master Mode | ||||||||||||||||||||||||||||||||||||||||||
|
| ||||||||||||||||||||||||||||||||||||||||||

Spinner is an optional Champion Monster in the Underworld. Click here for more details!


When you enter the far west room for the first time, you are faced with another Monster Keeper that has a similar appearance to the male character. He laughs and flips a lever, which deactivates the bridge beneath you, causing you to fall down the pit. He will then run off. In order to chase the Keeper, you need to activate a ground switch near the bottom right exit using a Monster with Summon Big Rock. This will cause a grappling anchor to appear. Use a Monster with Grapple on the anchor to get to the ledge above. Alternatively, when the Keeper deactivates the bridge, you can quickly jump and use a Monster with Improved Flying or Dual Mobility to get to the ledge.


Continue moving west until you spot the odd Keeper again. You will then come across an intersection. Since the lower path is blocked, you are forced to go to the upper path. Keep following the Keeper until you loop back to the intersection; this time, the lower path gate is opened. Go to the upper path again and close the gate. Backtrack through the lower path and chase down the Keeper. Now that the entity is trapped, the doppelgänger reveals itself as Spinner.
 |
Strategy[]
Spinner has a number of debuff-causing attacks he will use including Poison Bomb and Sticky Web, and all of his attacks will give Tether stacks and often Bleed stacks too, thanks to his passives. Because of this, Mass Restore is a must. The best way to deal damage is using magical fire, wind, or neutral attacks in order to exploit his weakness.
The most important thing to note, however, is that Spinner will use Counterfeit at the start of every turn, which will randomly copy a move used by your team last round. Because of this it is best to utilize actions that your team is not weak against, else you will be punished accordingly. Spinner's high offensive stats mean that returning such an attack to one of your Monsters could result in a quick death. Note, however, that Spinner's Counterfeit is NOT used as a bonus action - he will still only take two actions per turn.
King Blob[]
|
| ||||||||||||||||||||||||||||||||||||||||||
| Known Skills | ||||||||||||||||||||||||||||||||||||||||||
| Actives |
| |||||||||||||||||||||||||||||||||||||||||
| Passives |
| |||||||||||||||||||||||||||||||||||||||||
| Master Mode | ||||||||||||||||||||||||||||||||||||||||||
|
| ||||||||||||||||||||||||||||||||||||||||||

King Blob is a Champion Monster in Blob Burg. You must defeat it to complete the Blob Burg mission. It guards a chest containing a Slime Skin, which opens a new room somewhere in Blob Burg. Click here for more details!

To get to King Blob, you need to open certain chests, which open up entrances to new rooms in Blob Burg. You can enter King Blob's room from the top left ceiling entrance in the Teleporter Stone room.
 |
Strategy[]
King Blob will use Slime Volley as a bonus action at the end of every one of its turns, so a monster with Mass Restore to remove poison is a must. It will also give itself lots of buffs using moves like Full Utility and Helping Hand (which also heals it), so buff removal is also key. Its weakness is debuff damage, so bring units with Multi-Poison, Multi-Burn, and Bleed to rack up lots of damage.
If you want to trivialize this fight, bring a dark-shifted Sutsune skilled with Buff Steal, Feast and Blood Magic and focus on buff removal and adding Bleed stacks. Around 50 stacks the Bleed will outpace his healing even with full regeneration stacks and he'll go down quickly.
Vodinoy[]
|
| ||||||||||||||||||||||||||||||||||||||||||
| Known Skills | ||||||||||||||||||||||||||||||||||||||||||
| Actives |
| |||||||||||||||||||||||||||||||||||||||||
| Passives |
| |||||||||||||||||||||||||||||||||||||||||
| Master Mode | ||||||||||||||||||||||||||||||||||||||||||
|
| ||||||||||||||||||||||||||||||||||||||||||

Vodinoy is a super Champion Monster in the Horizon Beach. It guards a chest containing a Shift Stone. Click here for more details!
Vodinoy hides in the forgotten depths beyond a narrow path at the far east of the Horizon Beach. You must use a Monster with Blob Form or Morph Ball to enter and progress through a short labyrinth. You will find Vodinoy behind another narrow path in the next room.
 |
Strategy[]
Vodinoy hits very, very hard. Two main strategies for countering him are using monsters with physical resistance (as all his attacks are physical), or stacking Multi-Weakness on Vodinoy. Multi-Chill is also very useful for limiting his mana regen thereby limiting the level of skills that he can use, but may be less effective thanks to his water resistance. A recommended team includes; Diavola, Elderjel, and Sutsune. With a solely Multi-Weakness based team, it can be difficult to deal damage, but with a half bleed setup it can be easy to beat. While Diavola uses Weakening Shield, Elderjel and Sustune use wind attacks while giving Vodinoy bleed stacks.
Aazerach[]
|
| ||||||||||||||||||||||||||||||||||||||||||
| Known Skills | ||||||||||||||||||||||||||||||||||||||||||
| Actives |
| |||||||||||||||||||||||||||||||||||||||||
| Master Mode | ||||||||||||||||||||||||||||||||||||||||||
|
| ||||||||||||||||||||||||||||||||||||||||||
| Passives |
| |||||||||||||||||||||||||||||||||||||||||
| Master Mode | ||||||||||||||||||||||||||||||||||||||||||
|
| ||||||||||||||||||||||||||||||||||||||||||

Aazerach is a super Champion Monster in the Stronghold Dungeon. Unlike other Champion Monsters, you can only fight this Monster after clearing the entire Abandoned Tower and defeating the final boss of the game. Click here for more details!

Once you have finished the main storyline, go to the Teleporter Stone room in the Stronghold Dungeon. You will find Trevisan, who tells you of an Aazerach hiding in the room with six illuminated fireplaces in the wall. He gives you the demonic tome, Ahrimaaya, used to lure the Aazerach out. Go to the said room directly west of the Teleporter Stone room. You also need to activate a ground switch using a Monster with Summon Big Rock to open the gate. When you enter the mysterious room, move closer to the center, and the Aazerach will appear.
 |
Strategy[]
Aazerach will do three actions during its turn, always ending with either Shadow Storm or Shadow Grasp. On the first turn it has boosted dodge chance due to Concealed. This Monster can get pretty annoying due to it constantly applying Blind and Debuffs, while gaining Buffs through Martial Prowess or by stealing your Monster's Buffs with Buff Steal.
It is recommended to use Monsters that can apply Poison or that can remove Blind stacks. A good example is Goblin Warlock as it has Multi Poison, Purify, as well as resists Aazerach's magical attacks. Argiope is also a good pick as it can easily strip away its Buffs with Cleanse and apply Tether to negate its dodge and decreasing its damage output. Troll can deal lots of damage to this Monster with Boulder Toss when a lot of Debuffs are applied.
Do note that Blind causes attacks to miss, and that dodge and miss are two different mechanics. This means that Blind can cause undodgeable hits to miss, such as Aqua Blast, Shield Burst, Boulder Toss, Sure Strike, etc.
Diavola[]
|
| ||||||||||||||||||||||||||||||||||||||||||
| Known Skills | ||||||||||||||||||||||||||||||||||||||||||
| Actives |
| |||||||||||||||||||||||||||||||||||||||||
| Passives |
| |||||||||||||||||||||||||||||||||||||||||
| Master Mode | ||||||||||||||||||||||||||||||||||||||||||
|
| ||||||||||||||||||||||||||||||||||||||||||

Diavola is a super Champion Monster in the Sun Palace. Click here for more details!


You can get to Diavola by bringing a Monster with Secret Vision to reveal the invisible platforms on the beaten path in the Sun Palace near the Blue Caves entrance. Parkour on the platform to reach the upper-right ledge. Alternatively, you can ride a Lofty Mount to reach the ledge. Diavola awaits at the top of the next room.
 |
Strategy[]
Diavola hits hard with fire and earth attacks, causing Burn and Weakness on your party. It also causes lots of Bleed stacks both with its own attacks and upon getting attacked thanks to its Thorns passive skill.
Debuff damage is less effective because Diavola will use the move Restoring Shield as a bonus action at the start of every one of its turns without exception, removing those debuffs and making it harder to build them up. Note that this move will NOT remove stacks, however, meaning that Bleed is still an effective means of dealing damage here. Heavy hitting fire attacks are also extremely dangerous because of Diavola's Thorns skill, which can put enough bleed onto your damage dealers to potentially one-shot them after a good turn.
Diavola also likes to stack buffs on itself, so buff removal will be essential. Cleansing Flame is good here because it not only removes Diavola's buffs, but also exploits its weakness to fire.
Gryphonix[]
|
| ||||||||||||||||||||||||||||||||||||||||||
| Known Skills | ||||||||||||||||||||||||||||||||||||||||||
| Actives |
| |||||||||||||||||||||||||||||||||||||||||
| Passives |
| |||||||||||||||||||||||||||||||||||||||||
| Master Mode | ||||||||||||||||||||||||||||||||||||||||||
|
| ||||||||||||||||||||||||||||||||||||||||||

Gryphonix is a super Champion Monster in the Magma Chamber. It guards a chest containing a Skill Potion as well as the entrance to the Legendary Keeper hall. Click here for more details!


Grphonix can be found in the lower east area of the Magma Chamber. You need to lift a big boulder using a Monster with Levitate to get to Gryphonix.
 |
Strategy[]
A poison team is recommended here to exploit Gryphonix's weakness to earth. Having Multi Poison/Poisoned Nerves, Chill/Congeal and Fatal Upkeep makes this fight go through rather quickly. A good addition is a heavy hitter who can deliver a large blow at the end of a combo, so you can KO Gryphonix to spend its revival ability, then immediately take a chunk out of the revival HP with the many debuffs you've stacked on.
Restoration is incredibly useful here as well, especially if it's provided by a passive skill. The Gryphonix will be dishing out lots of burn debuff, and before long, will have 3 stacks on your entire team.
Vertraag[]
|
| ||||||||||||||||||||||||||||||||||||||||||
| Known Skills | ||||||||||||||||||||||||||||||||||||||||||
| Actives |
| |||||||||||||||||||||||||||||||||||||||||
| Passives |
| |||||||||||||||||||||||||||||||||||||||||
| Master Mode | ||||||||||||||||||||||||||||||||||||||||||
|
| ||||||||||||||||||||||||||||||||||||||||||

Notes: Vertraag does not normally know Sorcerer and Meditation.
Vertraag is a super Champion Monster in the Mystical Workshop. Click here for more details!
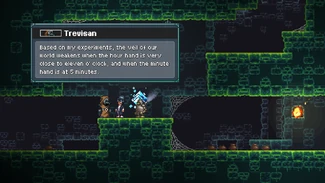
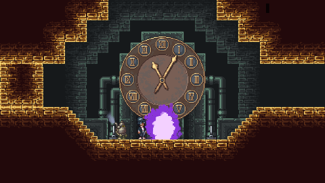
Once you defeated the Aazerach Champion in the Stronghold Dungeon, Trevisan tells you that setting the giant clock in the Mystical Workshop to 11:05 would reveal a hidden portal to another world. Entering this portal brings you to Vertraag's realm. Getting the hint is not necessary to unlock the portal as long as the player knows the correct time to set the clock.
 |
Strategy[]
Exploit Vertraag's neutral weakness. An example could be a shield burst team consisting of Yowie, Caraglow, and Kame. One surprisingly viable team consists of three damage focused Manticorbs.
Mad Lord[]
|
| ||||||||||||||||||||||||||||||||||||||||||
| Known Skills | ||||||||||||||||||||||||||||||||||||||||||
| Actives |
| |||||||||||||||||||||||||||||||||||||||||
| Passives |
| |||||||||||||||||||||||||||||||||||||||||
| Master Mode | ||||||||||||||||||||||||||||||||||||||||||
|
| ||||||||||||||||||||||||||||||||||||||||||

Mad Lord is a Champion Monster in the Abandoned Tower as well as the final boss of the game. Click here for more details!


As you you climb to the top of the Abandoned Tower, the Alchemists will prevent you from progressing until you beat them in a Keeper Duel. You need to defeat Ostanes and Vallalar, Zosimos and finally Chymes. At the top of the tower, you will face off against Marduk, and once you defeat him, the real mastermind, the Mad Lord, will reveal itself to you. Losing to Mad Lord will force you to start over and fight Marduk again.
 |
Strategy[]
Mad Lord is resistant to debuffs but not to stacks. Use a team that inflicts bleed and exploit his weaknesses for higher damage values to build up massive bleed stacks. Use a monster with Bleed Out and monsters that benefit bleed, such as Spinner, Sutsune, and Elderjel, to maintain the bleed over time and increase its damage. After a couple turns this will allow you to do massive damage faster than with normal attacks. If you can survive the first turn then Feast can reliably keep your team healed.
Ascendant[]
|
| ||||||||||||||||||||||||||||||||||||||||||
| Known Skills | ||||||||||||||||||||||||||||||||||||||||||
| Actives |
| |||||||||||||||||||||||||||||||||||||||||
| Passives |
| |||||||||||||||||||||||||||||||||||||||||
| Master Mode | ||||||||||||||||||||||||||||||||||||||||||
|
| ||||||||||||||||||||||||||||||||||||||||||

Ascendant is an optional Champion Monster in the Blue Caves. Click here for more details!


In the lower east area of the Blue Caves, you can find a waterfall as well as a blocked gate in the nearby room. Use a Monster with Summon Big Rock to activate the ground switch, which creates a grappling anchor, and then a Monster with Grapple on the anchor to open the gate. In the next room, you will spot Ascendant past another waterfall. The Ascendant will always fight alongside two Monks.
 |
Strategy[]
- Under Construction -
Dracomer[]
|
| ||||||||||||||||||||||||||||||||||||||||||
| Known Skills | ||||||||||||||||||||||||||||||||||||||||||
| Actives |
| |||||||||||||||||||||||||||||||||||||||||
| Passives |
| |||||||||||||||||||||||||||||||||||||||||
| Master Mode | ||||||||||||||||||||||||||||||||||||||||||
|
| ||||||||||||||||||||||||||||||||||||||||||

Dracomer is a Champion Monster in Forgotten World. You must defeat it to complete the Forgotten World mission. Click here for more details!
Once you defeat the Wanderer and obtain a Bard egg, go to the World Tree. At the bottom right is a magical wall, which you can remove using Bard's Minnesang. The next couple of rooms are filled with water, so you should use a Swimming Monster to move more freely. Keep moving forward, and you will find Dracomer at the end of the water cavern.
 |
Strategy[]
- Under Construction -
Terradrile[]
|
| ||||||||||||||||||||||||||||||||||||||||||
| Known Skills | ||||||||||||||||||||||||||||||||||||||||||
| Actives |
| |||||||||||||||||||||||||||||||||||||||||
| Ultimates |
| |||||||||||||||||||||||||||||||||||||||||
| Passives |
| |||||||||||||||||||||||||||||||||||||||||
| Master Mode | ||||||||||||||||||||||||||||||||||||||||||
|
| ||||||||||||||||||||||||||||||||||||||||||

Terradrile is a super Champion Monster in the Forgotten World. Click here for more details!


Terradrile dwells in the far west of the Forgotten World's lowest parts. The passage is blocked by several diamond blocks and breakable walls. Use a Monster with Crush or Charging Mount to destroy both obstacles. In the next room, descend until you spot a narrow path, which requires you to use a Monster with Blob Form or Morph Ball. You then must destroy the right wall to enter Terradrile's room. Keep going right, and you will eventually find Terradrile.
 |
Strategy[]
Terradrile hits like a truck. Every attack on it will provide it with charge stacks similar to Brutus. Additionally its first action of the fight will be to invoke its legendary power which significantly amps the number of charge stacks it has while also giving it a stack of predation. To counter either use moves that don't have many hits (like Heavy Punch) or just limit the number of offensive actions out the gate. Additionally Terradrile's most dangerous attack is Piercing Lightning which ignores 30% of the defense of the monster it's targeting. Its ground attacks aren't nearly as bad. Terradrile also alternates between physical and magical attacks, so avoid bringing any monster that has either a physical or magical weakness. Ideally try to bring monsters that have an air resistance and either have high HP or generate lots of shields. Terradrile can apply chill, shock and weakness as well as providing buffs for itself with its attack moves. Consider bringing along monsters that can either remove debuffs from your team or remove buffs from Terradrile. Terradrile also inflicts tether, further reducing the damage output of the team in addition to constantly providing itself shields and a barrier buff. Terradrile does seem to have some mana issues as it will revert to neutral attacks after a few turns. Consider bringing chill to limit its AOE attacks (of which it normally has 3).